Tuesday, December 18, 2012

25 Days of Gift Ideas: Shadow Box

This time of year, we typically have our family photos taken and of course send them out to family and friends.  This is a nice way to dress up those pictures and make them wonderful for display!


Using the CTMH My Creations Bracket Frame (Z1797) and the Flirty Paper Pack (X7160B).  You can  cut the bracket out using the CTMH Cricut Art Philosophy Cartridge <Square4>.  Cut the bracket at 10.8", then place on bracket with repositionable adhesive.  Flip the bracket over and cut out the center on a Versamat (Z1279) and the Cutting Knife (Z1252), then adhere with permanent adhesive.  (If you have a Gypsy or are comfortable with the Center Point button on your machine, you'll be able to use the Cricut to cut the square from the center of the bracket.

To create the shadow box effect, you can adhere the photo to the back corner pieces of the frame.  Or, stack pieces of our 3D Foam Tape (Z1151) to adjust how far back you'd like the photo from the opening of the frame. 

Monday, December 17, 2012

25 Days of Gift Ideas: Mini Cards & Tote


For this project, I created 12 - 3" x 3" cards to place inside this little tote!  

The tote was cut from the Cricut Art Philosophy <FontLayer><Shift><Square1> at 6.5".

I used the CTMH December Stamp of the Month: Year-Round Cheer (S1212), which has a cute image for each month of the year!  The cards/tote were created using the Flirty Paper Pack (X7160B) and Kraft Cardstock (Z1735), and were embellished with the Autumn Lane Assortment (Z1749), Burlap Ribbon (Z1760), Sparkles (Z1752) and Boutique Assortment (Z1763)


 I stamped images with Sky (Z2194), Ponderosa Pine (Z2145), Ruby (Z2170) and New England Ivy (Z2135) ink pads.


Sunday, December 16, 2012

25 Days of Gift Ideas: Post It Stand

This is another of my favorites for the simplicity and inexpensiveness of it!  Take a plastic 4x6 photo frame (shown below).  Typically less than $1 to purchase.  Design a 4x6 insert and lay the frame down.  Stick down a pad of post-it notes and wallah!


I used the CTMH Scholastic Paper Pack (X7159B), the Silver Metallics Marker (Z1768) and cut a square of the 12" x 12" Chalkboard Sheet (Z1789) to create the insert.


A first for me, this year I also added the "pen holder" by taking a piece of grosgrain ribbon and some red tape.  I placed the red tape on the ribbon (approx 1.5"), then wrapped it tape side out around the pen leave 1/4" of the tape exposed so it can be adhered to the frame.  This made the ribbon sturdier with the tape and ribbon layer, and the exposed tape was a quick and strong way to adhere it to the frame!


Saturday, December 15, 2012

25 Days of Gift Ideas: Petal Box

With CTMH Cricut Artiste, these little gift boxes are super cute and super easy!

Here I used the CTMH La Belle Vie papers (X7158B) and Stickease (X7158C).  Then used the bling from the Boutique Assortment (Z1763) and the Glitz Glitter Gels (Pink Z1770 and Green Z1771) to add a little dimension and shimmer to the Stickease.  I rubbed baby powder on the back of the wings so they wouldn't stick, allowing me to bend them up for some "inflight" action.

The boxes were cut at 1" for all pieces using Artiste:
 <Happy Mothers Day><Card> (cut 2) 
 <Happy Mothers Day><3DObject> 
 <Happy Mothers Day><Shift><3DObject> 

Add some chocolates, and you're in business!

Friday, December 14, 2012

25 Days of Gift Ideas: Notepad Folio

This project uses half of a 2 pocket folder (no prongs) and a small notepad from an office supply store.  

To decorate the front, I used the CTMH Florentine Paper Pack (X7153B), Sparkle Flourishes (Z1708) and cream organdy ribbon.  The focal image was stamped with the Quick Cards - Butterfly (A1120) in Twilight and Creme BrulĂ©e Inks using the rock n roll technique (stamping in the lighter color, then rolling the edges of the stamp in the darker color).

"Love as delicate as a butterflies wings; as strong as the circle of life"

You'll cut the folder in half at the seam, giving you two pieces to work with.  You'll trim each piece down to 10 3/4" x 8 1/4".  Rotate so the pocket is on the left and score at 5 1/4" and 5 1/2".  With one folder, you can make two folios (one folio will have a right side pocket, one will have a left side pocket).

Use glue dots or red tape to adhere the notepad on the opposite side of the pocket.  You can use a coordinating strip of paper to embellish the notepad.

Thursday, December 13, 2012

25 Days of Gift Ideas: Survival Pack

This is one of my all time favorite gifting ideas!!  This time of year, there are so many people we want to let know we're thinking of, without breaking the bank!  It's cute, sweet and useable!!

Our Cricut Art Philosophy Door Hanger, cut at 9 3/4", works great on a bottle of water.  Add a drink flavor and candy bar and you're in business!

I used the CTMH Pear & Partridge paper (X7162B) and Silver Shimmer Trim (Z1799).  The Cricut Art Philosophy also includes a variety of flowers you can quickly cut, spin and adhere to add a little dimension to your projects (don't forget the quilling tool (Z1795) to simplify your task).


You can also put it on a soda and add a bag of pretzels or chips.  Or a starbucks frappucino with a breakfast bar.  

Fill the pocket with a small notebook and pen for a meeting.
Of course, for a crop, embellishments and chocolate are a great treat!

So many ideas for "survival" kits, and this handy door hanger works perfectly!


Wednesday, December 12, 2012

25 Days of Gift Ideas: Paint Pail


 This will be the "gift bag" for our teachers holiday goodies.  I used the CTMH Scholastic Papers (2 pieces at 4" x 12") to wrap the pail, along with a 5 1/4" circle for the top.  This is a clear plastic pail, so you can see the backside of the paper, which dresses it up a bit.  The photo doesn't show the backside of this paper so well, but it's kind of pale (no pun intended) blue gridlines.  On some of the pails, I reversed the paper and have the lighter paper outside with the alpha/numeric paper on the inside.

 I set the boys to work with the ribbons, which can be a bit time consuming, but they enjoyed the task and it freed me up to work on more goodies.

The ribbon is a hodgepodge of my stash, mixes of organdy, grosgrain and ric rac to fully cover the handle.  You can get away with just doing a couple inches on each side, leaving the majority of the handle free...but since I had free labor, we opted to cover the entire handle.

I used the star <Star 5> and layer <Star5 / Layer> at 2" and 1.5" from the Art Philosophy Cartridge and the Pinwheel <shift / P / 3D Object> at 2" from Artiste.  I've become a huge fan of the Burlap Ribbon (Z1760)...the texture and versatility really add so much to cards, pages and projects!
  I placed 3D Foam tape (Z1151) under the button (Z1371 - Blue Assortment), so I could stick the Pin Clips (Z1612) into the foam to hold the stars.  

Tuesday, December 11, 2012

25 Days of Gift Ideas: Simply Scented

Here's a way to spruce up an inexpensive gift and make it a little more personal and special!  Find some inexpensive candles, then bling them up!

 Rummage through your scraps and stash and see what you can come up with!  For these candles, our Clementine Paper Pack (X7156B) and Cottage Assortment (Z1794) made this a quick project and dressed these candles up...perfect for coworkers, teachers and other acquaintances!

Monday, December 10, 2012

25 Days of Gift Ideas: Neverending Card

 Do you ever get inspired by magazine ads, mailers, commercials, etc?  Well, about 8 years ago I received a postcard advertisement, that continually opened like a Jacobs Ladder.  I held it for years thinking I'd figure out how it worked...and here's a version I've come up with.

 I used the Christmas Love (D1492) stamp set....I couldn't resist using "The Magic of Christmas Never Ends" on my neverending card...so punny!

The first page opens left to right, revealing this:
 Notice this window opens top to bottom, revealing this:
Another left to right opening, which has a little carry-over from the previous window, and then opens to our last window at the back of the card. 

This is the fourth and final window, when you open it top to bottom, it brings you right back to the beginning, allowing you to keep on going!

You could place photos within the card as well, or little notes, messages or whatever works for you!  The biggest note is you'll want to keep each window as flat as possible since it all folds within itself.

Visit my website to download the instructions to create your own neverending card!

Sunday, December 9, 2012

25 Days of Gift Ideas: Poinsettia Boxes

Need some quick and simple gifts?  These are for you!  

Using the CTMH Cricut Artiste Cartridge makes gifting a snap!  For these boxes I used the CTMH Pear & Partridge Paper Packet (X7162B), Cranberry Cardstock, bling from the Boutique Assortment (Z1763) and our fabulous self-adhesive Silver Shimmer Trim (Z1799)!


The boxes were cut on Artiste: <X><3D Object> at 2.5" (pg62) and the poinsettias <Z><Shift><Accent3> at 1.5" and 2".  I used the bone folder to score the petals to provide a little dimension, and 3D Foam Tape to layer the flowers on the box.

The silver trim works as an embellishment and adhesive to secure the bottom of the box (regardless of which side you decide to make as bottom), then a bit over the top to tie it all together.

Saturday, December 8, 2012

25 Days of Gift Ideas: Snowman Kisses

This is one of my favorites...there are all kinds of riddles and rhymes for Reindeer, Leprechaun, Snowman, Cupid and Bunny Poop.

None are nearly as sweet as snowman kisses...and combining this nice sentiment with the Close to My Heart Flakey Friends (C1506) stamp set makes a sweet treat!

I also broke out with our new Alcohol Markers and LOVE how vibrant the colors are...and so quick and easy to add color to any artwork!  This updated version of Snowman Kisses features our Avonlea Paper Pack (X7155B), the blues just make me think of winter fun!

You can see my previous version of Snowman Kisses by clicking here.

Click here to visit my website and download the instruction.

He's cute, cuddly,
& full of good wishes.
He wants to give you
these snowman kisses!


Friday, December 7, 2012

25 Days of Gift Ideas: Hershey Bar

Presentation always makes such a huge difference in gifting!  You don't have to spend a lot of money, but dressing up a simple "thought of you" gift, makes a huge impact!

Take a simply scrumptious piece of chocolate, like a Hershey Bar...whether big or small, you can make this delicious delight an adorable hit with a little paper and glue!


I previously posted a simpler version with patterned paper:

I scraplifted this rendition from a team member (Linda N) and thought it was so cute, I'd give it a try and add it to my 25 Days of Gift Ideas lineup!  Seriously...how stinkin' cute!!


For the larger Reindeer:
6" x 7" cardstock
CTMH Cricut Art Philosophy (Z1686) to cut the antlers, eyes and nose:
<Tag3><Shift><FontLayer> p50 at 2" (x2)
<Oval3> p42 at 1" (x2)
<Oval3> p42 at .75"
<Circle1> p21 at .75" (x2)

For the smaller Reindeer:
3 1/2" x 4" cardstock
CTMH Cricut Art Philosophy (Z1686) to cut the antlers, eyes and nose:
<Tag3><Shift><FontLayer> p50 at 1.5"(x2)
<Oval3> p42 at .5" (x2)
<Oval3> p42 at .35"
<Circle1> p21 at .35" (x2)


Thursday, December 6, 2012

25 Days of Gift Ideas: Coloring Matchbook

I really like this one for birthday parties, classroom parties, classmate gifts, etc.  A mini-coloring book with crayons instead of a baggie of candy!

For mine, I stamped images that could be colored, but you could just print clipart or coloring pages to insert into your Coloring Matchbook, especially if planning to make a large quantity.

 I used the Flakey Friends (C1506) stamp set, Outdoor Denim Ink (Z2140), Outdoor Denim Cardstock (1275), Crystal Blue Cardstock (1292) and Colonial White Cardstock (1388).

For the cover, I used 2nd generation stamping of the snowflakes to give them a softer look.  NOTE: The cover will be adhered last to hide the interior staple for the crayons.

I used part of a clear plastic envelope/bag, trimmed it down and taped it closed, then stapled the crayons inside.  After this is done, the Cover Art can be adhered to hide the staple.

These were my inside pages for the coloring book.  You can use any variety...look through your stash of stamps and see which would make great "coloring pages"!


Wednesday, December 5, 2012

25 Days of Gift Ideas: Sour Cream Container

These are great for party favors, classmate trinkets and other small items (although you can make them bigger to accommodate larger gifts).  

Sour Cream Container
4x6 patterned paper
5” Ribbon
Hole punch
TAG: 1 ½ x 1 ½  and 1 ¼ x 1 ¼ 


Place glue in a U shape on the outer edges of the 4x6 paper, leaving one 6" side unglued. 

Adhere the 4" sides together to make a "tube", then press down the bottom glued piece to close the bottom of the container. 

 Add treats.  Glue the remaining opening and pinch closed in the opposite direction as the bottom edge (giving more of a sour cream container look to it).

Create tag, then punch hole at top of Sour Cream Container and tag and run ribbon through.  


For this container, I used the CTMH Moonlight Paper Packet (X7161B) and the Christmas Love (D1492) stamp set with New England Ivy ink (Z2135).  

You can also choose not to glue the last edge and instead use the ribbon/tag to secure the end making it easier to extract the goodies without destroying the container.

Tuesday, December 4, 2012

25 Days of Gift Ideas: Purse-o-nality

I originally received this purse as a gift from my Secret Sister on one of our Close to My Heart incentive trips.  I immediately fell in love and couldn't wait to get home and teach all my friends and customers this adorable little bag...mini album...tote...purse...or whatever you use it for!

I used the Close to My Heart LaBelleVie Paper Packet (X7158B) because I love the black B&T floral/flourishes paper!  So elegant and pretty!

When folded into the little purse, you can include a small gift, treat or giftcard inside.  When fully unfolded, it can be a mini-album with pictures, words of wisdom, or a combination that can be flattened and hung by the little strap.
What I really love about this project, beyond it's simplicity, is that it can be created with so little paper/supplies!  Click her to download the instructions from my website!

Monday, December 3, 2012

25 Days of Gift Ideas: Corner Bookmarks

As an avid reader, I love bookmarks...but these are my favorite as they sit on the corner of the page!!  Just rotate and slip over the corner of your book page, marking your spot.

A quick gift idea that you can create using the scraps you have!  Great for teachers, classmates, coworkers...pretty much everyone!!

I used the CTMH Scholastic Paper Pack (X7159B and the Scholastic Stamp Set from our Scholastic Workshop on the Go (G1049)---Don't miss out, this stamp set/workshop is only available through January 30, 2013!!

Click here to visit my website and download the instructions for the corner bookmarks!

I used a full sheet label and stamped the "From the Library of" and "This book belongs to" in Outdoor Denim ink (1275) then trimmed/punched to create book labels to accompany the Corner Bookmarks!
They fit so beautifully in the Scholastic Tray with divider!

Sunday, December 2, 2012

25 Days of Gift Ideas: Gift Tray

This cute little tray is an adorable way to wrap a gift, gift card, love note or well...cold, hard cash! LOL

To create, I used our Close to My Heart Cricut Artiste Cartridge.  
Cut the Box Cover: <O><shift><3D Object> (pg 49) at 5.75" H
Cut the Box Tray: <O><3DObject> (pg49) at 5.75" H
Cut the rectangle out of the top of the Box Cover using <O><Accent4> at 3.6" H
(I used my Gypsy to line up the rectangle, another option is to place the blade in the center of the top of the Box Cover and select the "Center Point" button on your cricut)


I cut a 4x6 Flip Flap (Z4114), trimming the seams and adhesive strip off, leaving me 2 clear pieces of plastic.  I used one to cover the window of my box top to keep the goodies inside but visible.

I used the "red tape" to give me a solid seal on the plastic.  I recommend you take the adhesive to the edges.  This will reduce the chance of the plastic catching on the tray as it's being slid in and out of the cover.

These are going to be some of our Teacher Gifts this year, so I used the Close to My Heart Scholastic Paper Pack (X7159B) for the Box Cover and Black Cardstock (1386) for the Box Tray.

I also created a divider for my tray with black cardstock:  3 15/16" x 7 1/2", scored at 3 3/8", 4 1/4", and 5 1/8" allowing me to fold it so I have a divided tray.

Check back tomorrow to see the goodies I created to go inside the divided trays!

Saturday, December 1, 2012

25 Days of Gift Ideas: Simple Gift Card

  My Plan is to post every day for 25 days leading up to Christmas!  I hope these ideas will inspire and hopefully the directions will help you recreate!

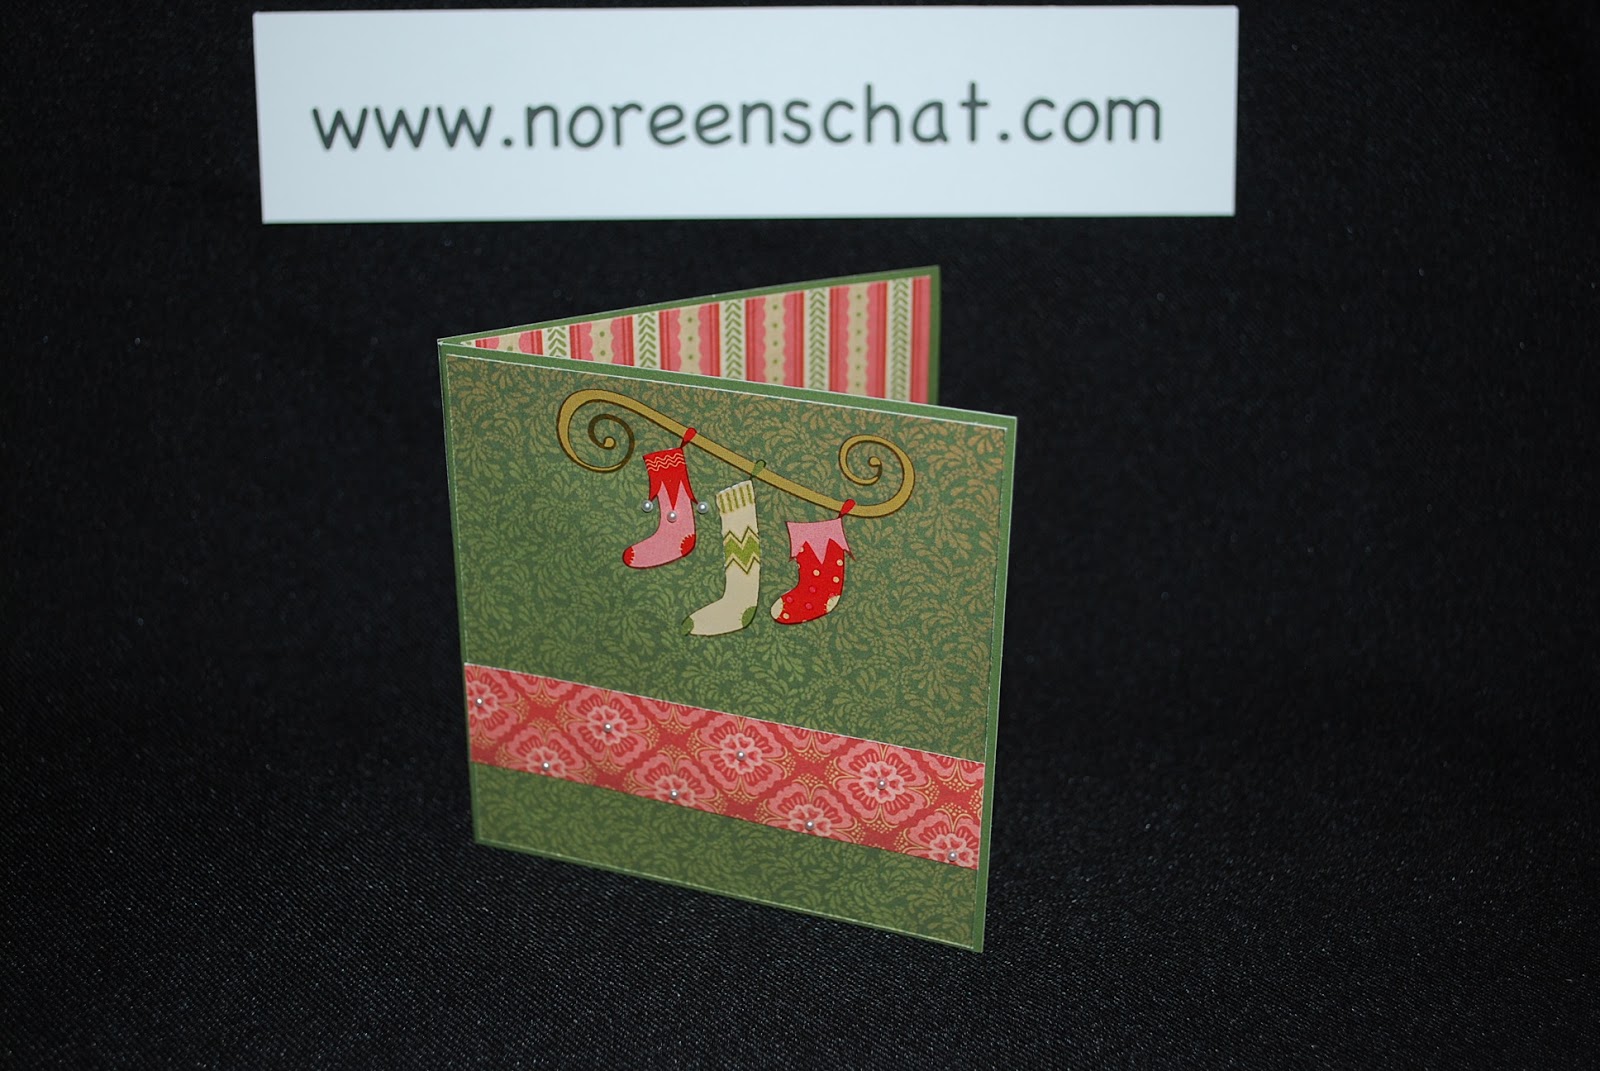
I love these super simple gift card holders!  Quick, easy and inexpensive to make.  These 4x4 cards will rock your holidays and gift giving any time of the year!

For these cards I used the Close to My Heart Pear & Partridge paper pack (X7162B), New England Ivy Cardstock (1282), and the Pear & Partridge Complements Glittery Rub-Ons (X7162C).

Each card uses a 4x12 sheet of cardstock scored into 4" squares with the middle section being scored diagonally in half 1 time to create the pocket.  Click here to visit my website and download the instructions.

I added a bit of "bling" to each card from my "stash".  These 3 benefited from our Sparkle Flourishes (Z1708), Bitty Opaques Pearl Adehsive Gems (Z1707) and the pretty bling from our Boutique Assortment (Z1763).